Thursday, January 27, 2011

Years in the Making

Fer at My Little Garden in Japan is hosting a blog carnival this month called New Year Gardening Resolutions.  We were asked to share any plans we have for our gardens this year.   Before I get to my project agenda for this year, first let me share a little history with you.

I have been working on some major changes in my backyard for a couple of years now.  A busy schedule and an injured arm have created some delays, but I am hoping that this spring I can complete the project (as much as any garden is ever completed). 

As with all of my landscaping projects at home, they all begin with...
"the stare."  
I stand out in my yard and stare at it until something comes to me.  Whenever my husband sees me standing out in the middle of the yard staring, he just shakes his head and says, "Now what are you up to?!"  Anyway, sometime in late spring 2008, the staring commenced in my backyard.  I wanted to decrease the size of the lawn area, add more pathways, and increase the bed areas.  The ideas started to flow.  I got out a garden hose and laid out the proposed lawn, bed, and path areas.   I liked it!  So I drew my ideas on paper.

Below is my rustic drawing of my backyard illustrating the "bones" of the layout.  The areas shaded gray within the dashed lines were lawn in 2008.  All of the areas in white were beds that were already established around the perimeter and inside of the pathways.  The pathways on the top and right side of the drawing were already in flagstone.  The pathway in the middle was nonexistent; it was lawn area.  The pathways on the bottom and left side of the drawing were grass pathways between beds.  Someday I'll have to do a post and show you how we started with "nothin' but dirt" in the backyard...but I digress.

  
A year later, in late spring, early summer of 2009 I removed the grass pathway and replaced it with flagstone creating what is now the flagstone path on the left side of the drawing.  There was quite a slope where the path entered the backyard (lower left side), so I decided that steps were needed.  First I had to extend some drain pipes in this area. After doing that, I started to level the area and added a row of boulders to hold back part of the slope. When I got to that point, I was a little overwhelmed with the "how to" of building steps, so I hired out that phase of the construction.


At that point it was July, and 100-degree temps tend to put the kibosh to major landscape projects.  When autumn came, along with cooler temps came an extremely busy landscape schedule for clients, so like the shoemaker's kids with no shoes, I was the landscaper with no time for landscape projects at home.

Winter brought much needed rest; but starting in February of 2010, my client landscape schedule geared up once again and went into overdrive.   As time allowed between jobs, I started to work again on my backyard project.    More drain extensions need to be added, and another "boulder curve" was added to stair-step the slope on the other side of the yard (lower right side of the drawing).

In June of 2010 I lifted the existing metal edging outlining the old lawn area (see dashed line on drawing), and moved it to enclose a smaller peanut-shaped area that is currently the lawn (see green shaded area marked "lawn" on drawing).


Then I started removing grass by hand using a pick-axe, shovel, and rake.  Slowly but surely, I got all of the grass removed, and I started to add decomposed granite to the areas that would eventually be pathways.


By mid summer all of the grass was removed from the pathway areas, and I had added decomposed granite as a base for the flagstone that I was planning to lay in the fall when the temps cooled down a bit.


Summer in Texas, and once again, it was too blasted hot to work.  And besides that, the pain that I had started feeling in my right forearm in the spring was hurting more and more.  We went on vacation in July and I thought the rest would do me some good, but my arm continued to hurt.  I tried my own brand of at-home therapy, and still the pain persisted.  So in August I broke down and went to the doctor.   That's when I got diagnosed with radial tunnel syndrome, and the Gimpy Gardener saga was born.

When I got the news from the doctor, at that moment, all landscape projects were officially on hold.  I first thought it would just be a couple months of recuperation and I'd be back to work.  Long story short, my arm was not well in two months, so I decided to go ahead and hire out the flagstone work so my project could proceed.  So in October of 2010 the flagstone work commenced.


After the flagstone work was completed, I wanted to plant dwarf mondo in between the flagstone.


 And 65 flats of mondo later, the pathways were complete.


Now to the point of this post (finally)....to tell you what my landscaping projects are for 2011.  If you refer back to the drawing, the areas shaded in gray on each side of the path are the new bed areas that were created by removing the lawn and adding the pathway.  They are just expansions of beds that already existed.

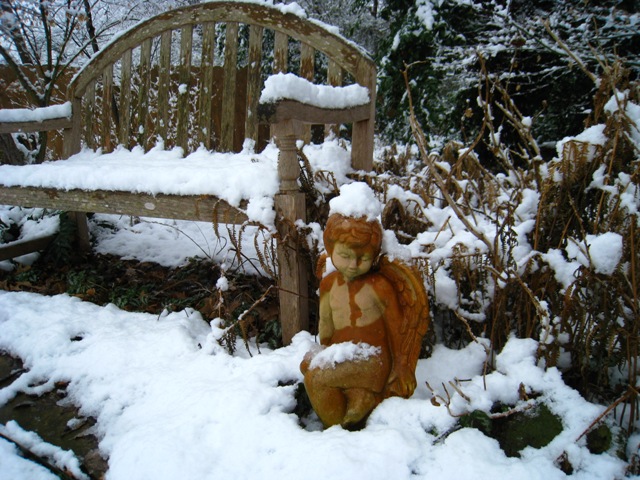
This is what those areas look like in January of 2011.  


To finish off those beds, I plan to:
  • Add several yards of compost
  • Add flagstone to create an area to hold the bench
  • Add plants
  • Add mulch 
I have already added a Peaches and Cream Japanese Maple on one side and transplanted an Oak Leaf Hydrangea.   To the other side I transplanted two Japanese Maples: Mikawa Yatsabusa and Orangeola.  For the rest of the plantings, I will do some dividing and transplanting of existing shade tolerant plants from my garden.  I might add another Endless Summer Hydrangea.  I plan on adding an Oakland Holly behind the Peaches and Cream Maple to give it an evergreen backdrop.  Other than that, I will just be keeping my eyes open for an interesting new plant or two.

Last year I had 3 crape myrtles removed from the east side (left side of drawing) because of the increasing shade.  I plan to add one 'Forest Pansy' Redbud tree in that area to give some height and color.

I hope you've enjoyed this journey through my backyard project.  If all goes well, I will be sure to post pictures of the plantings in the new bed areas.  Please visit again to see the completion.

Until then...

I hope you can start (or complete) some wonderful projects in your garden this year!

Toni :-)

Saturday, January 22, 2011

Mason Jar Macro

Gardening Gone Wild is hosting a photo contest this month called...

  Macro in a Mason Jar

The technique is quite simple.  You just place whatever you'd like to photograph in the bottom of a mason jar, lay your camera on the rim of the jar, engage the macro setting on your camera, take the picture, and, voila, macro in a mason jar.  If you'd like more detailed instructions on this photography technique, click here.

For my contest entry, I finally settled on placing a small stone in the jar.  I like to collect rocks, and this one caught my eye because it is full of tiny holes and has lots of detail.   This stone is also special to me because I picked it up on the shore of the Sea of Galilee when I went to Israel in July of 2008.


Next I placed the rock in the jar and placed it on my kitchen cooktop.  
The cooktop is black glass with tiny speckles in it, so I thought it would make a good backdrop.


Then I placed my camera on the rim of the jar.


Snapped the picture (er...several pictures)

And (drum roll, please) here is the end result.


The reflections of the stone in the side of the jar created an interesting scene.  I think it has an "outer space" kind of feel to it.   It kind of looks like a meteor floating in a galaxy far, far away, don't you think?  Okay...work with me here...you might have to use your imagination a little bit :-)

Here are a few other shots...


To see other contest entries, click here 

I am looking forward to experimenting with this technique when I have some blooms in my "outer spaces." 

Until next time...

Toni :-)

Sunday, January 16, 2011

Foliage Follow-up: Speckles, Spots, and Drops


Yesterday...I was hard pressed to find any blooms 
in my garden. 

But today, on this damp and dreary winter day, I was happy to at least find some interesting foliage.

I looked for characteristics in the leaves that made them just a little more special and worthy of a post.  

Here's what caught my attention today.


Need an evergreen shrub for an area that gets zero sun?

'Gold Dust' Aucuba will fit the bill.

The speckled foliage will brighten up a dark spot in your garden.

This is a fairly large shrub, about
4 feet wide and 4 to 6 feet tall.


Leopard Plant (ligularia or farfugium) is spot on when you need a hosta replacement that won't be lunch for the slugs and snails.  

Ligularia forms a mounded clump about 2 feet wide and 1 foot tall.


 I just loved the way the water droplets looked on the nandinas and columbine today.


This is 'Harbor Dwarf' Nandina.   
Only grows about 1 to 1 1/2 feet tall.

'Harbor Dwarf' spreads slowly. 
As with all nandinas, if you need to prune it, cut the tallest canes to the ground in late winter.
 The 'Texas Gold' Columbine is starting to revive after going semi-dormant in our summer heat.   Beautiful yellow spring blooms are on the way!


This is 'Nana' Nandina. 

It looks similar to 'Fire Power' as well.

Both are shorter varieties, staying about 2 to 2 1/2 feet tall, with great maroon winter color.


To see more interesting foliage from gardeners around the world, visit Pam at Digging for this month's Foliage Follow-up


Until next time,

I hope your foliage catches your attention...

Toni :-)

Saturday, January 15, 2011

What's Bloomin' - January 2011

It's Garden Bloggers Bloom Day
So I'm off to find a bloom
I wonder if I'll find some posies
Or only winter's gloom


As I walked throughout my garden
There was not a bloom in sight
What's left for a garden blogger
when faced with, oh, such plight?


Just then I saw a bud
Guess that will have to do


And then I saw some berries
Why, yes, I'll take those too!


So I came inside to look
For a bloom that I might mention
And saw my African violet
Just vying for my attention


This violet belonged to my grandmother
who has long since passed away
So today I'll honor her violet
which brightens my winter day


To carry on what she started
so many years ago
I've rooted this little cutting
Oh, I hope that it will grow!


To see what's blooming in other parts of the world, visit May Dreams Gardens

Until next time,

Enjoy what's bloomin'...outside or in

Toni :-)

Friday, January 14, 2011

An Eye on the Sky

When there's not much color going on in our gardens this time of year, sometimes we just have to look up.


The first picture I took from my front yard, 
and the next two were from my backyard.   

Can a picture ever do a sunset justice?

I cannot look at a beautiful sky without thinking of Psalm 19:1

The heavens declare the glory of God; 
the skies proclaim the work of His hands.

To see more amazing attempts at capturing the beauty above, 
Skywatch Friday

Keep your chin up, folks!  
Spring is on its way, and who knows... 
you might just see a beautiful sky when you look up :-)

Happy Skywatching!

Toni :-)

Wednesday, January 12, 2011

A Super Arbor Day

What makes an Arbor Day super?  
When it's a Super Bowl, Super Grow Arbor Day!


In honor of Super Bowl XLV The City of Grapevine is one of 12 host cities in the Dallas/Fort Worth Metroplex participating in the Super Grow XLV program.  More than 6500 trees will be planted throughout the host cities to offset the environmental impact of the Super Bowl being held at Cowboys Stadium in Arlington, Texas, on February 6, 2011.

For those non-football fans among you (and for those of us who haven't studied Roman numerals since elementary school), XLV is 45 to us common folk.  So to commemorate Super Bowl 45, the City of Grapevine planted 45 trees on their January 8 Arbor Day (with the help of many volunteers).  Grapevine has received the "Tree City USA" award for the past 25 years for its participation in Arbor Day.


Here are my tips for successfully planting trees...

When planting trees, never add anything to the planting hole except the soil that came out of the hole.  Plant the trees high.  Take the tree out of the container, scrape the top couple inches of soil off the top of the root ball until you can see the flare of the trunk.  (I just use a broom to brush the soil away).  That is the top of the root ball.  Break up any roots encircling the root ball.  
 

Plant the tree in the planting hole with the top of the root ball (the flare of the trunk) a couple inches ABOVE your soil grade.  Backfill around the root ball with the soil that was dug out of the planting hole.  Water well to settle the soil.   Add compost to the TOP of the root ball area if needed, feathering it out to your surrounding soil grade.  Then mulch around the tree taking care to not cover the trunk flare. 
 

NOTE:   If you are planting a Shumard Red Oak or Chinese Pistache, you will need to wrap the trunk with tree wrap for two years to prevent sunscald and borer attack. 


A poem was read at the beginning of the Arbor Day festivities.   This poem was written by an elementary student several years ago.  Her poem captures how valuable trees are in our environment.   I wonder whether this student is on her way to getting a degree in forestry now :-)

A WORLD WITHOUT TREES

I once had a dream
about a world without trees.
There were no green things
as far as I could see.

It was time to start my day;
My mom told me to get up.
I ate my pancakes sadly
because there was no maple syrup.

I sat on plastic furniture
because there was no wood.
I played on my plastic piano,
but it wasn't very good.

It really hurt my lungs to breathe.
There were no trees to clean the air.
I looked out of my window.
There was erosion everywhere!

I went out in my yard one day
just to pass the time.
There were no leaves to jump in,
nor big, tall trees to climb.

There were no sounds
of singing birds
or little chipmunks
to be heard.

No soft, sweet fragrance
filled the air
from blossoming trees
which would should've been there.

I found no shady place
to read my book;
No weeping willows
by a shady brook.

I came in thirsty and hungry
But Mom said with a sigh,
"I'm sorry, there's no lemonade,
and I can't make apple pie."

There was no wood for the fireplace,
No nuts for little squirrels,
No paper for me to write on,
No treehouses for little girls.

I woke up from my horrible dream
to the sound of humming bees.
How very thankful I was when I saw
this beautiful world filled with trees.

By Tiffany Rene' Scherich, Silverlake Elementary, February 1996, 4th grade

For another great blog heralding the value and benefit of trees, check out Garden Walk Garden Talk.

Have you ever heard that trees reduce stress and actually aid recovery after surgery?  Since I have surgery on my gimpy arm scheduled for February 15, 
I'll have to put this theory to the test!

Until next time...
Give thanks for the trees!!

Toni :-)


Monday, January 10, 2011

Dem Bones

When Jack Frost stops by for a visit and renders your perennials brown crispy remnants of their former glory or when Old Man Winter drops buckets of the white stuff all over your garden, what is left?

Dem bones.  Garden bones, that is.


Garden bones get to shine when the blooms have faded.   Garden bones consist of those things in our gardens that give structure and strength, height and depth, bringing interest whether our gardens are a riot of color or devoid of blooms.

Just as our bodies would be a lifeless pile of skin, 
so our gardens would look dead without bones!


So just what are these bones that I speak of?   

They are the permanent structures in our gardens that add interest no matter the season, such as trees, evergreen shrubs, walkways and paths, ponds, fountains, statuary, arbors, trellises, gazebos, and benches.

A flagstone pathway leads through an arbor
Evergreen shrubs line a flagstone path leading to a pond
Trees add height and structure


Evergreen trees or large shrubs have good form as well as function.  Not only do evergreens anchor a garden design and give it structure, they can serve as a screen from the neighbors, as a windbreak from harsh northern winds, or just as a backdrop for deciduous shrubs and/or perennials.

Hollies, laurels, nandinas, and other shrubs with berries also provide food for winter birds.

Possumhaw Holly loaded with berries

Just as "the leg bone connected to the knee bone and the knee bone connected to the thigh bone," so garden bones connect different areas of our gardens, tying them all together.  Garden paths, whether made of stone, gravel, mulch or grass, allow the visitor to meander throughout the garden.
Well-placed seating invites visitors to sit a spell.


Even the layout of garden beds, whether in long sweeping curves or formal straight lines, constitutes this skeleton of the garden.  Good bones give your garden visual appeal even before a single plant has gone in the ground...


...as well as after the plants have gone dormant.

Flagstone paths define the garden beds

The sweeping lines of garden beds stand out when the blooms have taken a back seat.  Ornamental grasses provide winter interest.


Shrubs form an evergreen skirt around the house

 When there is no competition from foliage,
the beauty of tree bark comes to the forefront, as well. 
What once went unnoticed in our gardens now captures our attention.

Rough bark of Chinese Pistache
Red twigs of 'Sango Kaku' Japanese Maple

Cinnamon bark of 'Natchez' Crape Myrtle

Large boulders seem to pop out of the landscape once again when the surrounding plants have gone dormant.


Trellises and other garden ornaments add interest to our gardens whether they are dusted with snow or accompanied by foliage or blooms.


Could your garden use a little backbone? 

During this time when our gardens are dormant, look around at those blank spaces that are left behind, and see where you can incorporate some garden bones.  

It just might breathe a little life into your garden... 
even in the dead of winter.

Until next time...

Toni :-)