Monday, February 27, 2012

Waiting on Spring


The first daffodil of the season
brings a smile to my face
But also finds me wishing
that spring would pick up the pace


Yes, spring's the time we so long for
after winter's dormant state
Anticipation grows with each new day
I just hope it won't be late


Awaiting spring's arrival
the time just seems to creep
I'm waiting for perennials
that slept and crept.... to leap!


Bulbs that lie beneath the soil
are sending up some green
but blooms of blue and yellow, too
are waiting to be seen


Soon temps will rise and soil will warm
from shining rays of sun
this gardener will rejoice in spring
'cause the waiting will be done

 
By Toni @ Signature Gardens

Hoping your wait will be short...

Toni :-)

Friday, February 3, 2012

Potting in DIY Style

I have been wanting a potting bench for quite some time.  After all, I am a gardener, and don't we all NEED a handy place to play with dirt in pots?   Yes, of course, we do!

Every time I saw a potting bench, I would look at it longingly, but for one reason or another, I just never seemed to be able to find the perfect one.

A few years ago while touring a garden in our area,  I saw a bench that I really liked that was made by the homeowner's son.   This young man was kind enough to give me construction instructions and a picture.  It went in my "garden ideas" file for "someday."   Here's a picture of that bench (sorry for the poor quality - it's a scan of a photocopy).


Recently I was at a client's yard, and I noticed that she had a potting bench.  She told me that her husband had built it for her, and that got me to thinking...I wonder if maybe I could build one.

I had the potting bench bug -- and bad!  I came home and started researching on the internet for DIY potting benches.  Lo and behold, I found this great website called Thrifty Decor Chick, and she had a post on building a potting bench with very detailed instructions.    I liked the basic construction of her bench, but I wanted to make mine a two-tier bench with decorative cast iron brackets like the one that I had seen on the garden tour earlier.  Here's a picture of TDC's potting bench.


I decided that my potting bench would work great on my side yard right across the walkway from my greenhouse.    Here's a view of my side yard.   I am not sure I have ever shown this part of my yard before, basically because it's pretty nondescript.   This is where I have a rain barrel, my greenhouse, and a small square foot garden area for veggies.


TDC's bench was larger than my space allowed, so I started calculating the measurements for my side yard space and drawing a plan, and measuring some more, and thinking and dreaming, and checking the measurements just one more time (okay...at least 10 more times!) until I finally came up with a plan that is basically a marriage of the two benches.

I took all of my measurements down to the local Lowe's, and the nice guy in the lumber department cut all of the cedar lumber to my precise details.


A couple boxes of screws, a drill and countersink drill bit, tape measure, my pile of precisely cut lumber, a couple cool wooden finials and decorative cast iron brackets, a few prayers, and we were ready to go.

After I hurt my arm last year and became the Gimpy Gardner for a time, one of the lessons I learned was that it is best to ask (or beg) for help rather than to try and overdo it (besides, I need to save myself for diggin' in the dirt!).

So...enter Handy Husband.  Well, actually, he's not so handy with construction tools, but he's got Popeye forearms, and all I needed was someone to drill a bunch of holes and screw in some screws.    How hard could that be, right?      Well,  I am very picky and want everything done perfectly, and my husband is sort of a "just get 'er done" kind of guy.   He had to keep reminding me that we were building a potting bench, not a nuclear bomb, so we could probably give the picky perfect precision thing a little rest.

So we got to work.  It started coming together little by little.   I could see it taking shape before my eyes!   It was so exciting!!

And without further ado (drum roll, please) here is the finished product!  


Is this awesome, or what?!!!   I absolutely LOVE it!!!!   I still cannot believe that we actually built this with our own hands from scratch!   One of the biggest thrills for me in doing a landscape design is seeing what I have in my mind and drawn on a piece of paper actually come to life.  That is exactly what happened with the potting bench.


The detail on the upper back of the bench is a piece of old decorative iron that I have had for years.  I don't remember where I got it, but I just thought it was beautiful and figured I'd find a place for it at some point.   The cross bars on it used to protrude through the top and bottom of the piece at varying heights.   We used a metal cutting blade on our angle grinder and cut those pieces off.  And after grinding down the bumps of the screws a little bit, it fit perfectly in the space between the cross braces.  I think it adds so much character (and a little bling) to the bench and makes it one of a kind.


If you'd like the details of how we constructed the bench, keep reading.   
If not, then I'll catch you next time.

*   *   *

Here are all of the supplies needed and measurements for the potting bench:

Cedar lumber:
2 - 35 1/2 inch 4x4 (front legs)
2 - 57 1/2 inch 4x4 (back legs)
4 - 58 1/4 inch 1x4 (top and bottom braces)
10 - 18 1/2 inch 1x4 (side braces)
8 -  20 inch 1x6 (bottom shelf)
3 - 58 1/4 inch 1x6 (bench table top)
1 - 49 1/4 inch 1x4 (bench table top between 4x4s)
1 - 56 3/4 inch 1x6 (back brace near table top)
1 - 56 3/4 inch 1x4 (back brace near top-tier shelf)
1 - 58 1/4 inch 1x12 (top-tier shelf)

2 decorative cast iron brackets (9 x 6 3/4 inches)
2 wooden finials
cast iron hooks
1 box 3-inch galvanized screws
1 box 1 5/8-inch galvanized screws
Stain/sealer

The final measurements are 58 1/4 inches wide, 65 1/4 inches tall (at finial height) and 21 inches deep.   The table top is 36 inches tall.

First we attached the top and bottom braces (1x4s) across the front and back legs (4x4s).  The bottom brace is 6 inches from the bottom.  The braces are placed 3/4 inch over the edge of the 4x4 to allow for a side brace to be added later.


Next we attached all of the side braces, top and bottom of the bench.  We put braces on each side of the 4x4 legs and two more across the top of the bench for extra support.


Then we added the bottom shelf which is made up of eight 1x6s laid perpendicular to the shelf with wide spaces (about 3/4 inch)  between each board.


Then we attached the table top boards horizontally across the length of the bench.   The bench table top is made up of three 1x6s and one 1x4 piece.  The 1x6s form the widest part of the table top, and the 1x4 piece fits between the 4x4 legs that go up to form the top tier.  We spaced the boards approximately 1/4 inch apart.


Next we attached the back braces to the 4x4s of the upper tier; a 1x6 near the table top part of the bench, and a 1x4 up at the top where the top-tier shelf rests.   A flat bracket was also attached to the back side for extra stability across the back.


Then we attached the top-tier 1 x 12 shelf, the decorative star brackets, the wooden finials, and the decorative iron piece across the back.


Cast iron hooks were added to the ends of the table top 
for hanging garden tools.


I wanted to keep the bench two-toned cedar, so I stained the legs and finials with Cedar Naturaltone stain, and I sealed the rest of the bench with a clear sealer. 

If you live in the Dallas/Fort Worth area and you'd like us to make a potting bench for you, we are taking orders.  Please email me for pricing.   Or try your own little DIY handiwork.  You might just surprise yourself!

Happy potting...

Toni :-)

Wednesday, February 1, 2012

Grass Guy

Looking for a fun project to do with your kids 
on a cold (or warm) winter day?


Here's what you need to get started:

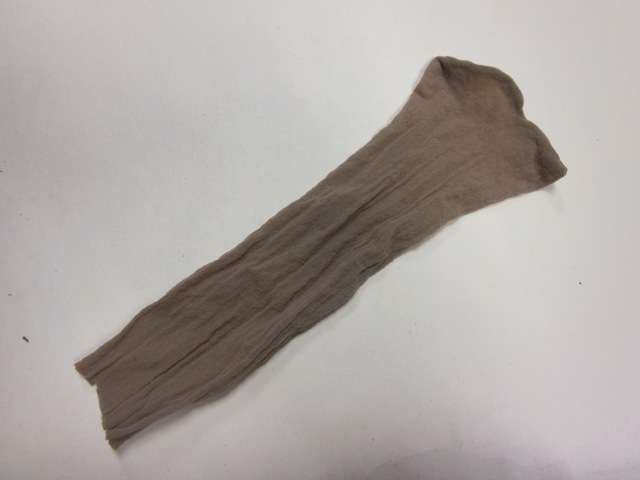
Knee-high pantyhose
Rye grass seed
      (about a tablespoon)
Potting soil
      (about a cup)
Tiny rubber bands
Google eyes
Buttons
Pipe Cleaners
Craft Glue
Mason jar
Water


Step 1:  Put about a tablespoon of rye grass seed in the toe of the knee-high pantyhose (this grass seed becomes the "hair" when it sprouts)

Step 2:  Put about a cup of potting soil into the knee-high on top of the grass seed.   Put in enough soil to form about a softball size "head"

Step 3:  Tie the pantyhose in a knot just below the soil ball.  Leave the long tail (it becomes a wick)

Step 4:  To form ears, pinch a small amount of soil and pantyhose and put a rubber band around it; repeat on other side.   Follow the same step to form a nose.

Step 5:  Glue on google eyes, button for nose, pipe cleaner for a mouth.  Allow glue to dry before proceeding to the next step.

Step 6:  Soak the top of the soil ball (and grass seed) in water for a few minutes until the soil becomes moist.  Then fill the mason jar with water, and put the "tail" of the pantyhose down into the water.   The tail will wick water up into the soil ball keeping it moist.   Refill the jar with water as needed.

Step 7:  Place your Grass Guy in a sunny location, and watch his "hair" grow!

Here's Grass Guy as a "newbie"
Isn't he cute :-)
 

After about a week, we have "hair"
He's still a cute little "sprout" :-)

Here he is in his adolescent years

They grow up so fast!

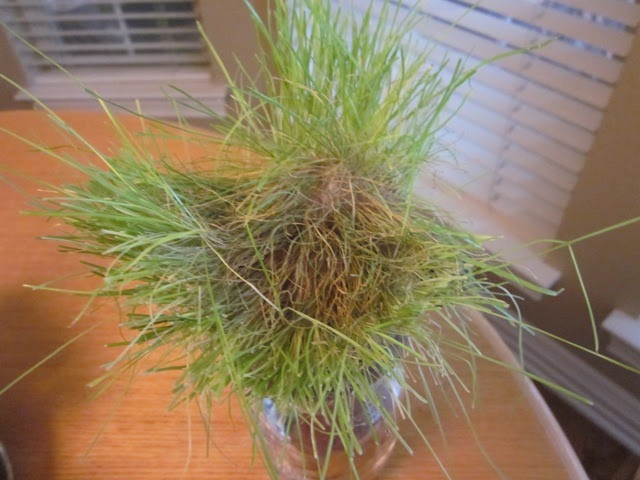
Having a bad hair day
 

Oops, looks like a little MPB is setting in

Time for the compost pile?

"I'm watching you!"

 Have fun!!

Toni :-)

Monday, January 30, 2012

Diggin' in the Dirt Newsletter - Spring 2012

The signature of God is written in flowers

          
Diggin’ in the Dirt  
Late Winter/Spring 2012 Newsletter 

(tips for a Zone 7/8 garden)


Click here


Happy Gardening,

Toni :-)

Thursday, January 19, 2012

Of Moss and Men

Moss...

my mind wanders and I imagine a cool, damp garden 
draped in an emerald carpet. 


I am fascinated by moss.  Maybe it is because I don't have much of it in my garden, except on some rocks by my pond.


When we were in Georgia on vacation this summer, I visited Callaway Gardens.  The moss growing along the sides of the paths caught my attention.  This would be a rare sight during a Texas summer.


At our vacation cabin (which was on 8 acres surrounded by a river on 3 sides of the property) I saw lots of beautiful moss.


I took these mossy pictures as I went exploring the property. 

Note to self:  
Do not go exploring in the Georgia mountains again 
without putting on chigger repellent!!!

Don't these pictures make you just want to reach out and pet the moss :-)


I came across a wonderful website recently when I was on Blotanical looking for new blogs to visit.

David Spain and Ken Gergle are landscapers in the Piedmont region of North Carolina.  According to their website, they operate the only moss nursery in the United States.   They have the cutest little product called Moss Rocks!   Check out their website and blog to learn some interesting information about moss and see the beautiful moss gardens they have designed.


(Note:  I have no affiliation with this company or these men; I just was so impressed with their website and landscape designs in moss that I just wanted to share their site with you.)

I corresponded with David through email recently; and he assures me that I can, indeed, grow moss in Texas.

I am on a mission to grow moss; but I fear that come August, that cool, damp, emerald-carpeted garden of my imagination will be just that -- my imagination.

Cool, mossy dreams to you....

Toni :-)

P. S. Also, visit Deb at Deb's Garden to read a very informational post on how she has grown beautiful moss paths in her woodland garden.

Tuesday, January 17, 2012

Blooms Among the Foliage

I've been a little distracted the last few days with planning a little DIY project for my backyard (more on that later), so I missed Garden Bloggers Bloom Day on the 15th and Foliage Follow-Up on the 16th.  I did manage to take a few pictures of what's blooming among some fabulous foliage, so I thought I'd share them with you...just a little late.

As I showed you in my Bare Bones post, there's not a lot blooming in my perennial or shrub beds, but I use containers for adding color in the winter.

A pot of cyclamen, oxalis, ivy, and sedum sits by my back door which is a shady spot where pansies would not do well, and it's close by in case I need to give it a little extra protection on the chance our temps dip into the low 20s or teens.


 Pansies and kale are really foolproof 
and can take just about anything our Texas winters dish out.  

Pansies are not pansies!


Here's a grouping in a side planting topiary.


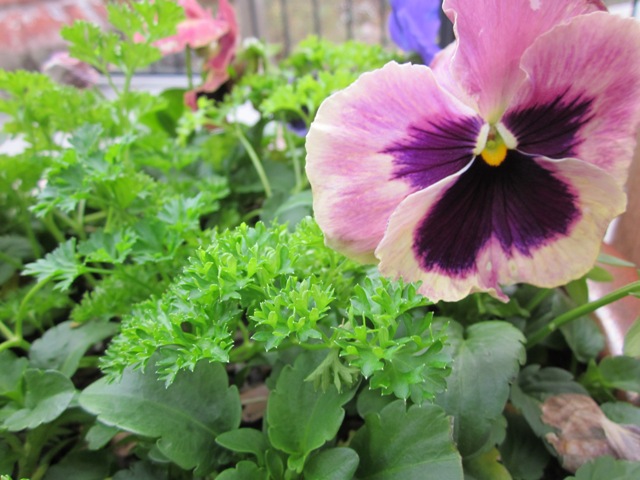
I also mix curly parsley in with pansies for added texture 
and bright green color.


A new pansy companion in my containers is bok choy.   I am not sure how it would do if it got down into the low 20s or teens, but in the high 20s and low 30s, it has done great.  I hope to use more of this next year.


Oh, no!  It looks like I've got a worm on my bok choy!  

 I got this cute little rock caterpillar for Christmas :-)

In the veggie garden I've got some cabbage that is beautiful, but it is extremely slow growing.


And here's my broccoli.  I am so proud of this broccoli.  I know it is small, but this is the first time I have actually been able to grow broccoli that is even remotely respectable.   I tend to grow mini veggies.   In fact, my grandson was at a salad bar one time, and they had some of that baby corn (you know the corn you see in Asian food?), and he said, "Hey, it's Mimi corn!" 


Here are a few little side broccoli shoots.  
Once I cut the main head off, I expect these little side shoots will grow too.


And one new perennial in my backyard shade bed caught my attention this month.   This is Heuchera 'Southern Comfort.'   I just love the coppery shades of the leaves.  I have not had huge success with heucheras in the past, but I couldn't resist this one at the nursery last spring.  But, hey, it survived our brutal summer last year, so in my book, it's already a winner!


 I hope you've enjoyed my January blooms and foliage.

If you're running a little behind this month, too, and haven't had a chance to check out Garden Bloggers Bloom Day, click here.  And for some other great gardens of foliage, click here.

As I mentioned at the start, I can't wait to show you the DIY project I've been working on (planning and dreaming, planning and dreaming).   I got some inspiration online, drew out a plan, took all the measurements (10 times!), got the lumber cut today, we've got all the screws, and the drill is charging as we speak.  Tomorrow, Lord willing, is the day.     If this thing turns out like the one I've got pictured in my mind, I will be so excited!     I can't wait to show you.

Stay tuned...

Toni :-)